Have you been using up all of your data? Did you know that you can save on your monthly bill and prevent overages by connecting to WiFi or a wireless network? If you have an android phone from 2014 to the present, you have the ability to connect to any available wireless network.
The first thing you want to check on is if you are by any wireless networks. If you are at home and have a wireless router or wireless modem, then you most likely have WiFi. The back of the router usually has the login info you need for access.
If you are out in public, many places offer free WiFi. Places like McDonald’s, Burger King, Dunkin Donuts, Starbucks, Public Airports, Hotels, and more allow you to connect to their wireless network.
Connecting Your Android Phone to a Wireless Network
- Go to Settings.
- Click on Connections.
- Where it says WiFi, enable it.
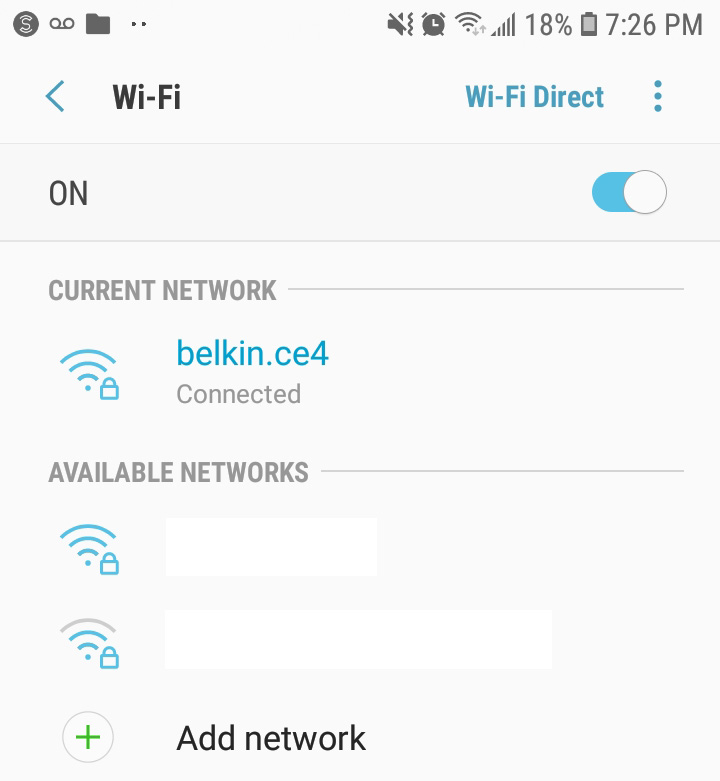
- After WiFi is enabled, click on the word “WiFi” to bring up all the available networks.
- Select from one of the available networks.
- A) If you click on one of the public wireless networks, your web browser will open to complete the connection request. You usually have to accept the terms and conditions. Once accepted, you will be connected to the internet.
B) If you select a wireless network that is private, you will have to enter a password to gain access. If the connection is a success, the WiFi symbol at the top of your phone should be visible, right next to your data bars.
Additional Tips for Connecting Your Phone to WiFi
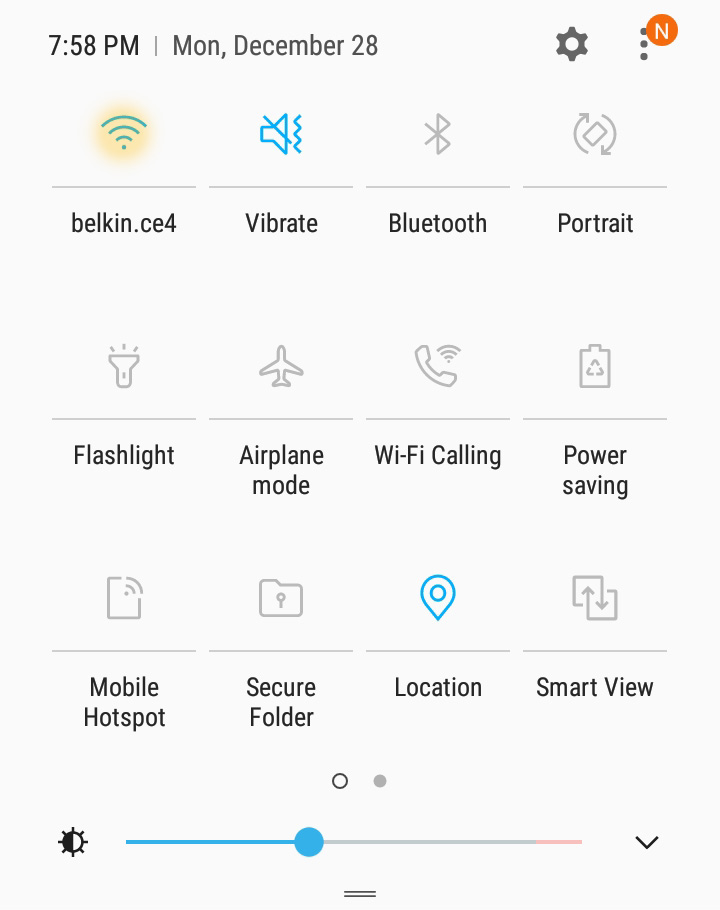
 While Settings is the place to go to enable WiFi, if you have a newer phone, you can access WiFi through the Quick Settings menu. You can do this by sliding your finger from the top of the screen in a downward motion towards the center of the screen.
You will see the symbol for WiFi. Press and hold the icon for 1 second and the available wireless networks page will appear. From there, you can proceed with following steps 5 and 6.

